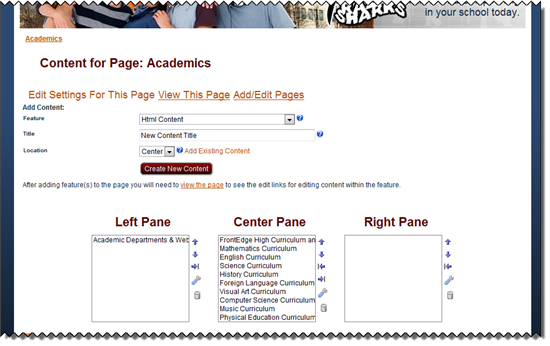
Add New Web-Part to a Pane
First navigate to the "Content for Page" section.
Web-parts may be added to the panes. You can use multiple instances of a web-part on the same page. To add a web-part to a pane:
1. Select a web-part type from the feature drop-down menu.

2. Enter a Title for the web-part (this title can be displayed on the page or be hidden by manipulating the Settings  on the web-part once you have added it to the page).
3. Choose the location (which pane) you want the web-part to reside in.
4. Click the Create New Content button.
5. The web-part will be added with the title you entered to the pane (location) you indicated.
Note: You can add multiple web-parts to a pane and you can add multiple instances of the same web-part to any place on the page. For example you could put 3 HTML Content web-parts in the middle pane, 1 HTML Content web-part in the left pane, and 2 Twitter Feed web-parts in the right pane.

6. Now you can continue to add web-parts to the panes on the page, or go configure the settings on and add content to each web-part you've already added to a pane on the page.
7. To begin configuring Settings on the web-parts you've added, click "View this Page." Use the wrench and pencil icons to manipulate web-part settings ( ) and/or edit web-part content (
 ).
).
Editing Your Web-Part Arrangement / Layout
If you accidentally place web-parts in the wrong panes or want to experiment with your layout, you can move web-parts after they have been added to panes.
You can also delete a web-part, but doing so is permanent (the web-part cannot be recovered without help from the Support Team if you accidently delete it.