Add a Link From One Page to Another Page in Your CMS Website
Your SchoolFront Portal CMS website has multiple pages. Adding a link from one page in the site to another page in the site is easy.
Important: There is nothing in the system to prevent you from using the standard Link icon ( ) and the page URL to add a link to text or an image, but we recommend you follow the steps below to create a link that will keep working even if you (or someone else in your school or district) change the name of the page to which you linked. If you link from one page to another by simply pasting a URL into the URL field in the Link Properties window, the link will break if the page name changes for any reason.
Example from the HTML Content Web-Part (WYSIWYG Editor)
This example pertains to the HTML Content Web-part with the WYSIWYG editor, but the concept can be applied anywhere in SchoolFront Portal CMS that you can add a Link using the "Browse Server" button (explained below).
If you are editing content in the WYSIWYG HTML editor and you want to turn a word, phrase, or image into a hyperlink that links to another page in your SchoolFront Portal CMS site:
1. Use your cursor to highlight the text or image you want to hyperlink.
2. Click the Link button ().
3. The Link properties window will open.
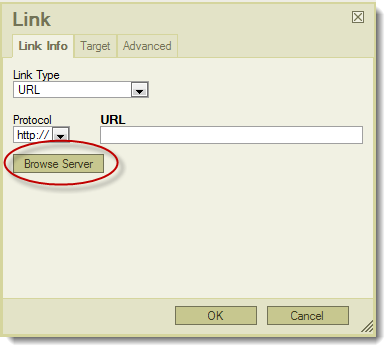
4. If you were going to hyperlink to an external source, you would type the URL into the URL field, but since you want to link to another page in your website, you will click the Browse Server button instead to locate the page on the server.
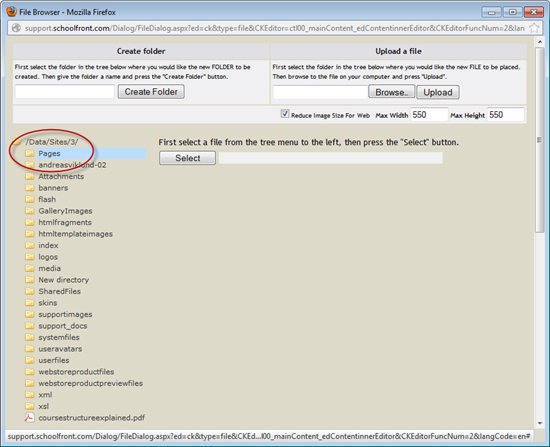
5. Double-click the Pages folder to open it. This folder holds the reference for all pages in your SchoolFront Portal CMS site.
6. Locate the Page to which you want to hyperlink and select it (click it once) with your mouse cursor. The file name of the page you selected will appear in the field next to the Select button.
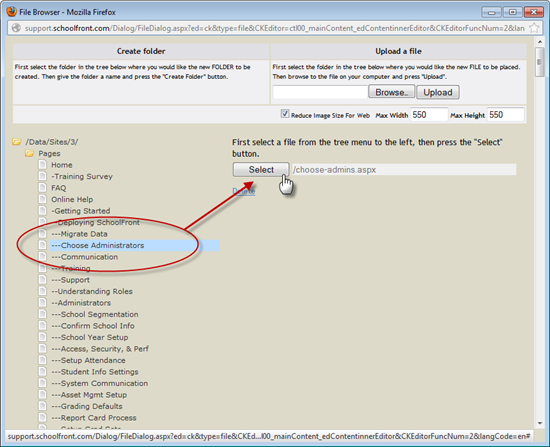
7. Click the Select button.
8. The page reference will now appear in the URL field.
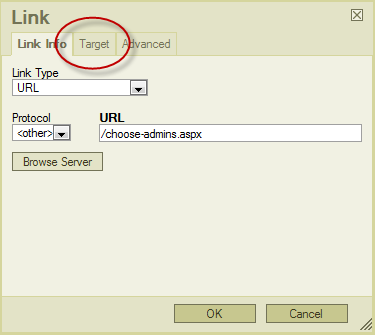
10. If you do not care about specifying a target, skip to step 12. If you want to specify a target for the linked page (i.e. if you want the page to open in a new browser window rather than in the users primary browser window) click the Target tab.
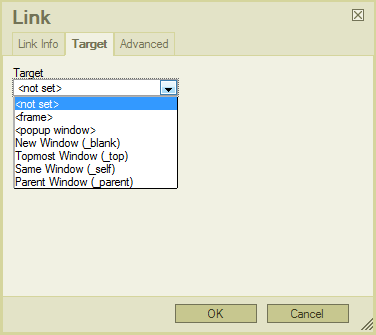
11. Choose a Target from the drop-down menu:
-
<not set>: This is the default and pretty much the same as indicating "Same Window (_self)." If the user clicks, the new location will populate in the user's currently opened browser window.
-
New Window (_blank): If the user clicks, the new location will populate in a brand new browser window.
-
Topmost Window (_top): If the user clicks, the new location will populate in the user's top-most browser window.
-
Same Window (_self): If the user clicks, the new location will populate in the user's currently opened browser window.
-
Parent Window (_parent): If the user clicks, the new location will populate in the window from which the current window spawned.
12. Click the OK button.
13. The hyperlink has been added.