Check-in Property That Has Been Returned
When someone has borrowed school property and then returns it, it is important to capture that transaction in the asset management log so that the person is no longer held responsible for the property.
Checking the property in formally also allows you to note the condition of the property to make sure that it is in the same condition as when it was checked out.
Step-by-Step Instructions
1. Login to SchoolFront as an administrator.
2. Click the Manage Assets link in the left navigation menu.
3. Locate the asset record in the grid which you wish to assign to a user and click it to open its details.
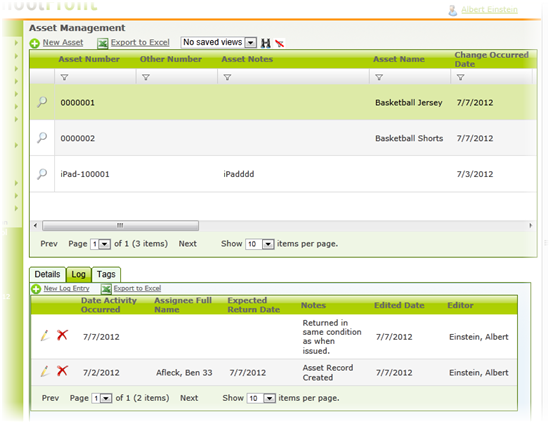
5. Click the Log tab.
6. Click the New Log Entry link.
7. Fill in the Date of Activity--i.e. the date on which the user returned the asset/property (this may or may not be the current date).
8. For this transaction you can leave the Date to be Returned blank.
9. If you want to make any notes about the transaction, you can write them in the Notes field.
10. Select an Asset Status from the drop-down menu. In this case, it will likely be something like "Returned / Available."
11. Select the person with whom or the location in which the returned item will be stored.
12. Select the Condition of the returned property from the drop-down menu.
12. Click the Insert button.
13. A log entry will be created in the Asset Log recording this transaction.