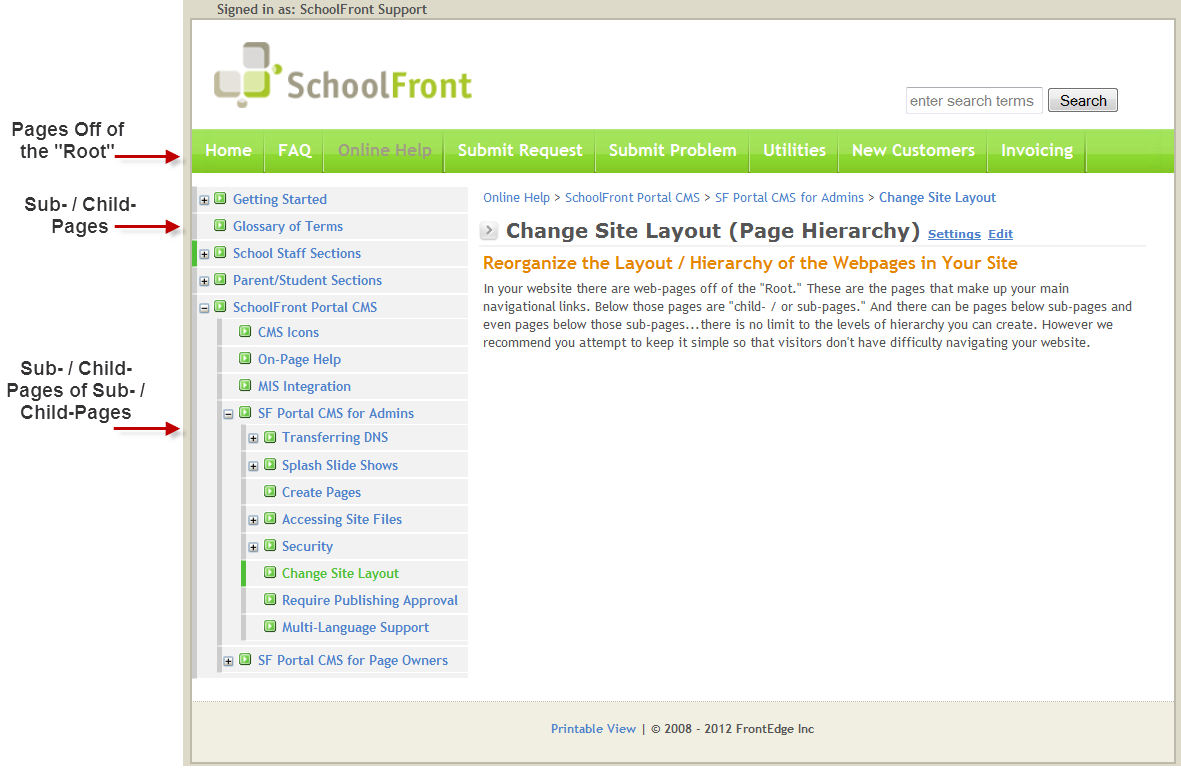
Reorganize the Layout / Hierarchy / Order of the Pages in Your Site
In your website there are web-pages off of the "Root." These are the pages that make up your main navigational links. Below those pages are "child- / or sub-pages." And there can be pages below sub-pages and even pages below those sub-pages...there is no limit to the levels of hierarchy you can create. However we recommend you attempt to keep it simple so that visitors don't have difficulty navigating your website.
The easiest way to check out the current hierarchy of your website is to go to the site map. The site map for SchoolFront customers is typically located at the URL, "http://yourdomain.com/SiteMap.aspx."
If you ever decide that you'd like to change the layout or configuration of pages in your website hierarchy, doing so is fairly easy.
Step-by-Step Instructions
Change the Parent Page of a Sub- / Child- Page
Note: If you change the parent page of a child-page, all sub-pages of the child-page will be moved with the child page to the new parent.
1. Login to the CMS.
2. Go to the page for which you wish to change the parent page.
3. At the bottom of the screen click the Page Settings button ( ).
).
4. In the Parent Page drop-down menu, select a different parent page.
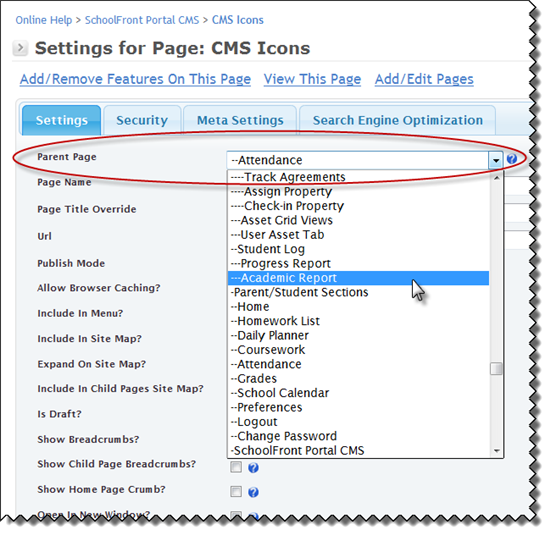
5. Click the Save button.
6. The page will move to the new parent and all child pages of the current page will move with the child-page (which is actually their parent page) to the new parent.
Move a Sub- / Child-Page Up or Down in the Page Hierarchy
If a parent page has several sub-/child-pages, by default those child-pages are put in the order in which they were created under the parent with the oldest page on top and each subsequent page appearing below. This may or may not be the actual order in which you would like the pages to be listed in your Site Map and menus. Child-pages can be easily re-ordered under a parent page. To do so:
1. Login to the CMS.
2. Scroll down to the bottom of any page and click the Administration button ( ).
).
3. In the Click the section called Add/Edit Pages.
4. the Page Tree view will be displayed.
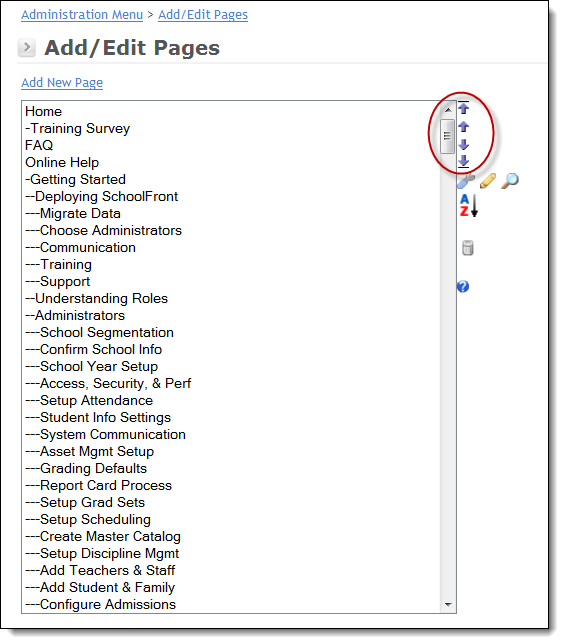
These arrows are used to move pages around in the website hierarchy. If you select a page in the hierarchy list:

-
The arrow at the top will send the page to the very top of the list under its parent page. It will not go higher than its parent page.
-
The second arrow will send the page up just one page higher.
-
The third arrow will send the page down just one page lower.
-
The arrow at the very bottom will send the page to the very bottom of the list under its parent page. It will not go lower than the lowest child-page under its parent page.
Permanently Delete a Page
If you add pages and then decide you no longer want them in your site, you can delete them permanently.
Important: Remember that you can edit the page ( ), change the settings on the page (
 ), and you can move it all around in your site hierarchy (see above). Consider doing these things before you choose to delete it.
Deleting a page is a terminal action. The only way to recover a deleted page is to contact SchoolFront Support, so make sure you are 100% sure you want to delete the page before you do it.
If you wish to delete a page:
1. Login to the CMS.
2. Scroll down to the bottom of any page and click the Administration button ().
3. In the click the section called Add/Edit Pages. The Page Tree view will be displayed.
4. Select the page name in the page tree list.
5. Click the little trash-can / garbage icon ( ).
).