Uploading Files Exactly When You Want to Use Them
There are two main ways to upload files for usage in SchoolFront Portal CMS.
File Manager
The first way is via the File Manager, which you would generally do before you plan to use the files or after the files are in place when you want to either update/edit or replace the files.
Ad Hoc Upload
The second way is via one of the dialog windows that spawn from editing (via the pencil icon) various of the web-parts (e.g. the HTML WYSIWYG editor).
Some examples of file types that can be uploaded and used at the point of need are:
-
Image Files
-
Flash Files
-
Audio Files
-
Video Files
-
Documents (e.g. PDF or Word)
Here are some example places in SchoolFront Portal CMS where ad hoc file uploads may be easily used by clicking the Browse Server button (click to see details):
 When the image icon is clicked in the HTML WYSIWYG editor, the Image Properties dialog window opens.
To upload and use a file, click the Browse Server button.

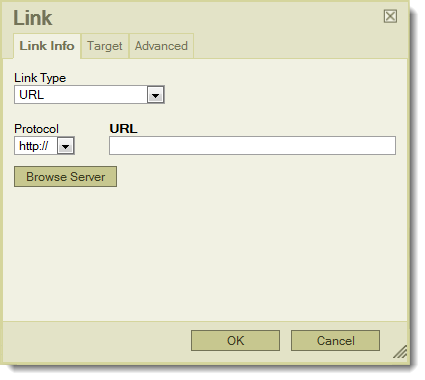
 When the hyperlink icon is clicked in the HTML WYSIWYG editor, the Link Properties dialog window opens.
To upload and use a file, click the Browse Server button.
Once you click the Browse button, the File Browser window will open.
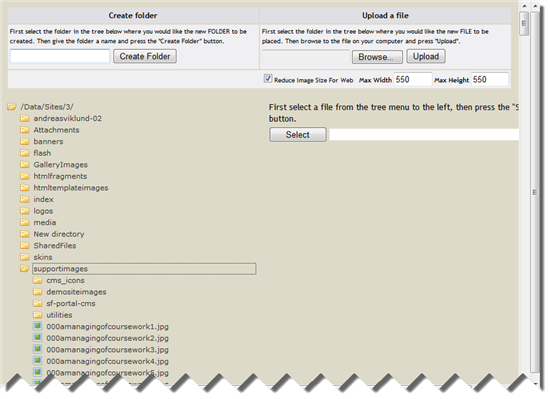
The folder structure used to manage the files that make up your CMS website are located on the left.
1. Find the folder into which you would like to upload the file (e.g. image, video, document, etc.) which you want to use in the location you placed your cursor in the WYSIWYG editor.
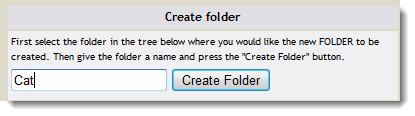
2. Double-click the folder to open it, OR click the New Folder button to create a brand new folder.
Note: If you create a new folder, it will be created in whatever folder you have selected at the time--for example if there is already a folder called "Pics" and you want to create a sub-folder in the Pics folder called "Cats" in order to keep your images intuitively organized, you must double click the Pics folder to open it and then type "Cats" into the field next to the New Folder button. Then you'd click the New Folder button and the sub-folder would be created in the parent folder, Pics.
3. Before you upload your image, select the folder into which you want the image uploaded and ultimately stored.
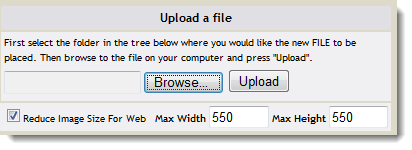
4. Next click the Browse... button in the upper-right area of the File Browser window.
5. Locate the file you want to upload and open it.
6. The next step will be to click the Upload button, but before you do that, notice the little checkbox directly below the Browse and Upload buttons. It says "Reduce Image Size For Web." This checkbox will make the system automatically down-sample any large images so that they do not cause performance issues for your customers and also allows you to type in a default Max Height and Max Width--the defaults are 550 pixels for both. We generally recommend that you leave this checkbox checked. If you upload a massive image, it can cause major delays when someone is trying to view your site or the page for the first time. They will have to just sit there and wait while the image loads, and if their system or network are super slow, they may abandon the page before it loads. The checkbox helps prevent such issues.
7. Click the Upload button. The File Browser window will refresh.
8. The file you uploaded will now appear in the selected folder on the left.
9. Select the file and click the Select button.
10. The image path will now appear in the URL next to the Browse Server button.

11. Fill in the remaining properties in the dialog if applicable. For example, if the file is an image, these are the properties you could fill in.
12. Click the OK button to insert the file.